EasyAR HMD Extensions
EasyAR and Head Mounted Device SDK
Most EasyAR features and device features are not overlapped. So EasyAR do not delegate device functionalities in most cases. When you need to use some device features like gesture recognition, you need to follow the way the hardware officially offers, and learn usages and application scope of these features from its official documents.
To EasyAR, device SDK offers motion tracking capability on their devices, and this is the only feature EasyAR take use of from the device. Please read Motion Tracking and EasyAR Features for the relationship between EasyAR and motion tracking, and which EasyAR features can be used when motion tracking is available.
To Pico, Qiyu, Rokid, Nreal and other AR/VR display devices, they do not use EasyAR to make devices to work. EasyAR adds more possibilities to the device in some scenarios.
Please reference Head mounted device Compatibility for device and device SDK supported by EasyAR.
Import Device SDK and Prepare to Use
Import Device SDK
Please get device SDK from hardware official channel. Here we list download or document link of a few devices known to work. Please contact the hardware maker if there are any difference or link not found.
QIYU ToB SDK, it is not released to public. Please contact Qiyu or EasyAR if you need to use.
Rokid UXR2 SDK, please contect Rokid for the exact document location.
Make sure device demo works correctly
If this is the first time using device SDK in present project, make sure to use its own demo first without EasyAR. Usually these demos require some special project settings, please follow official documents. Physical Camera input demo are provided by many device SDK, like RKCameraPreview from Rokid. EasyAR require input from physical camera. Many other demos does not use physical camera, so the device itself or these samples can work and display contents is not enough to say the device or project is ready for EasyAR.
Tips: EasyAR will display some message in front of camera which will show up if the device SDK is correctly configured. If you see nothing when running EasyAR, it is quite possible the device SDK is not correctly configured and the device demo will fail to run reasonablely. For example, on Nreal, you need to fix all errors showed by menu NRSDK > Project Tips in some versions of Nreal SDK. There are similar configurations when using other device SDKs.
Import EasyAR Sense Unity Plugin
Use Unity’s Package Manager window to install the plugin from a local tarball file.
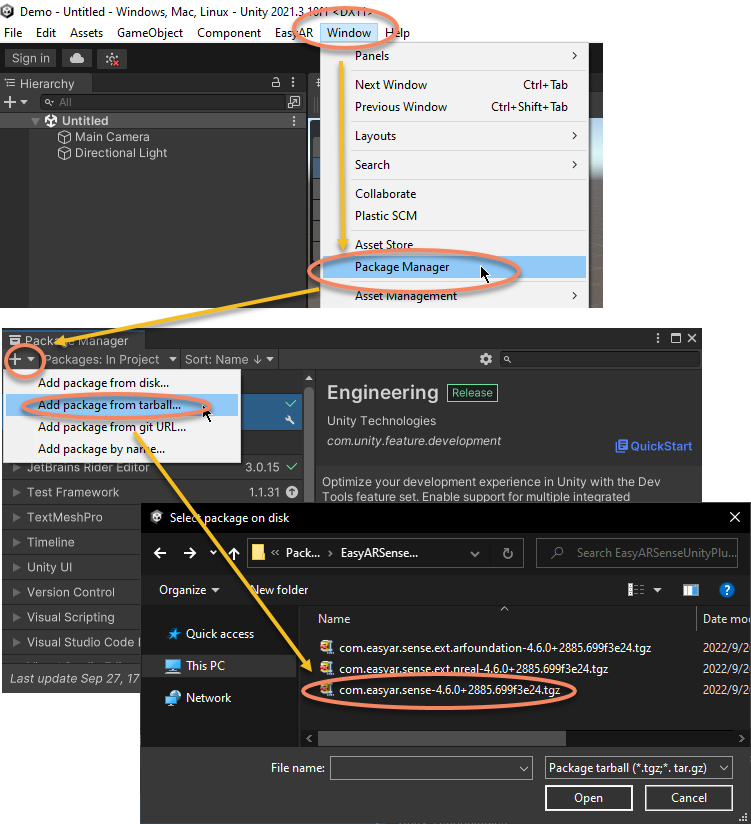
Choose the com.easyar.sense-*.tgz file in the popup dialogue.
Import EasyAR Sense Unity Plugin Extension for the device
Different extensions should be used when using difference device SDK. Use Unity’s Package Manager window to install the plugin from a local tarball file. Here we list package names and download file names for known extension,
PICO Unity Integration SDK: downloa file
EasyARSenseUnityPluginPicoExtension_*.zip, Unity package iscom.easyar.sense.ext.pico-*.tgzQIYU ToB SDK: downloa file
EasyARSenseUnityPluginQiyuExtension_*.zip, Unity package iscom.easyar.sense.ext.qiyu-*.tgzRokid UXR2 SDK: downloa file
EasyARSenseUnityPluginRokidExtension_*.zip, Unity package iscom.easyar.sense.ext.rokid.uxr-*.tgzNreal SDK: downloa file
EasyARSenseUnityPlugin_*.zip, Unity package iscom.easyar.sense.ext.nreal-*.tgz
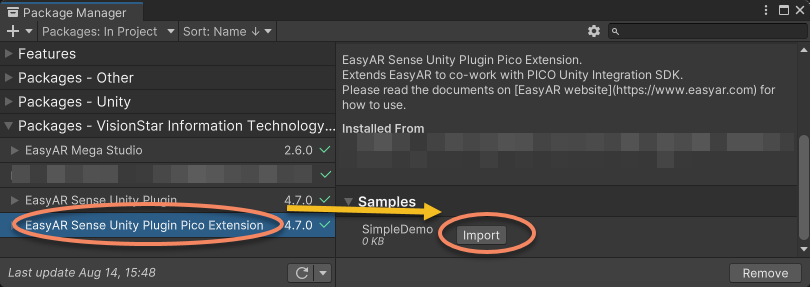
Use Samples from Device Extension
The samples are distributed within the extension package (not inside Mega Studio if using Mega). You can import samples into your project using Unity’s Package Manager window.
Use Pico as an example,
Please reference EasyAR HMD Extensions Sample for sample description.
Add EasyAR Support in Device Scene
The following images use Nreal for example, operations are same when using other device extensions.
Prepare a Usable device Scene
In the next section, a usable device scene is required. Create a scene usable on device according to device documents or its demos. You can also use its demo directly.
Add EasyAR Components in the Scene
Add EasyAR AR Session in the scene. AR Session can be created from some AR Session presets using EasyAR Sense > Ext: * > * GameObject menu.
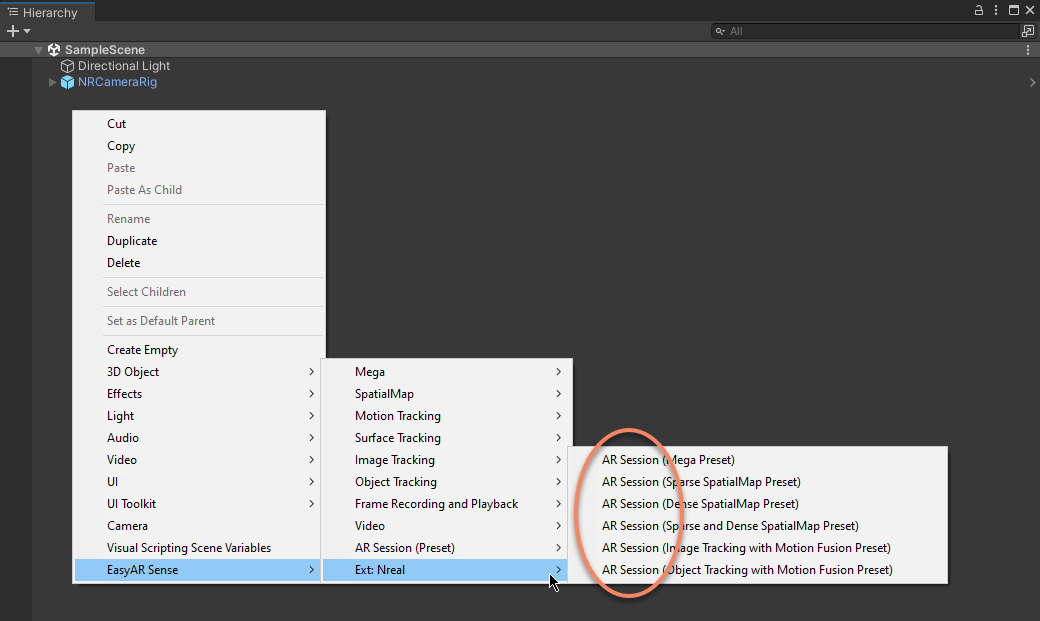
You can also assemble AR Session by yourself if necessary. Make sure the assembled AR Session has the corresponding device frame source (NrealFrameSource for Nreal) in it.
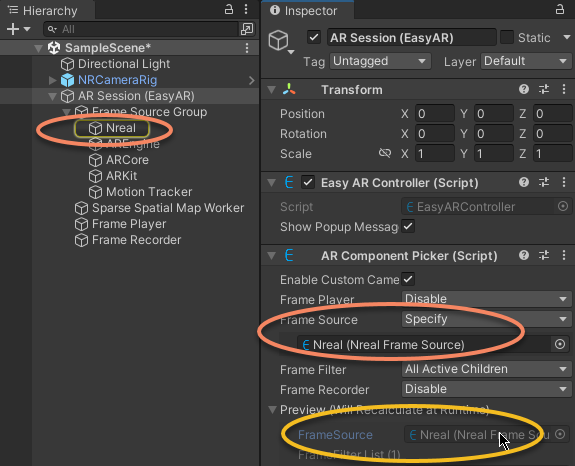
To use EasyAR on device, the device frame source must be selected as frame source in the AR Session after Session start.
This could usually be done by set ARComponentPicker.FrameSource to FirstAvailableActiveChild and make sure the device frame source is the first frame source in transform order,
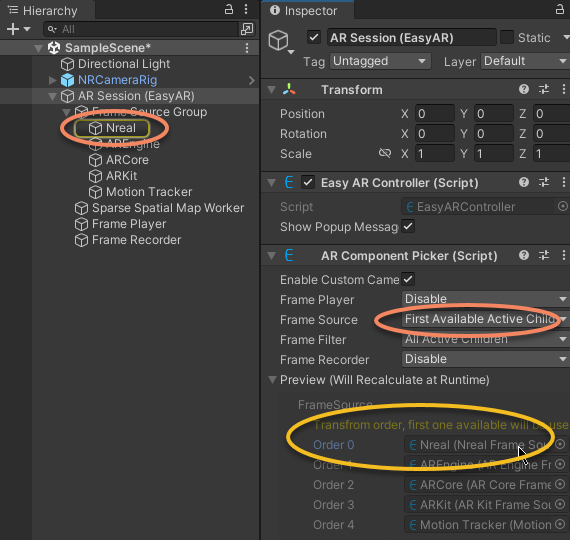
Or set ARComponentPicker.FrameSource to Specify and specify the frame source to the device frame source.
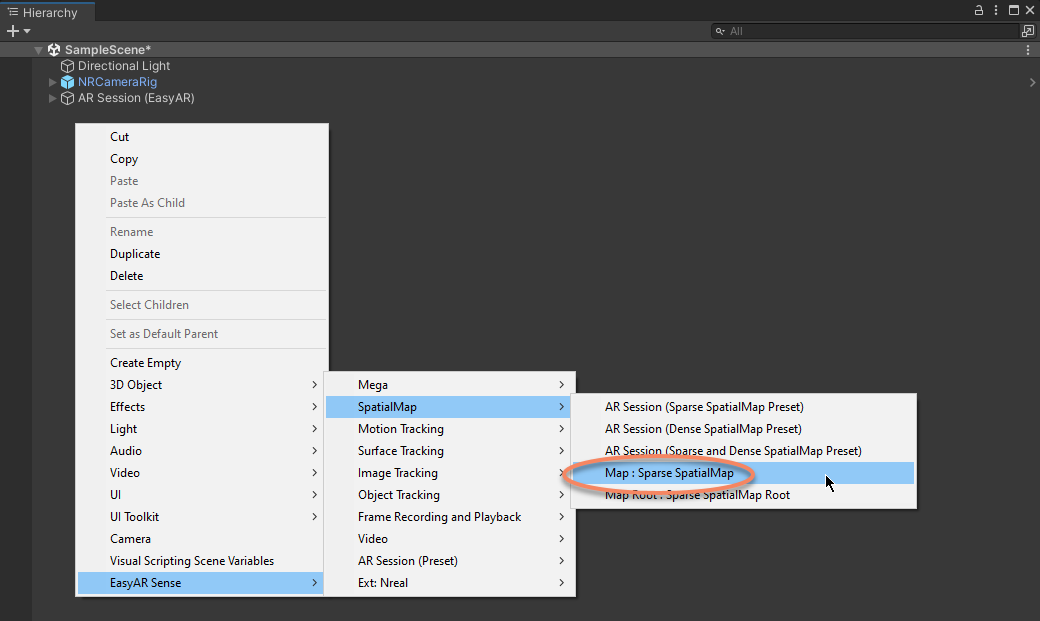
Then add targets or maps in the scene, for example, if you want to build Sparse SpatialMap, you need to create SparseSpatialMapController by EasyAR Sense > SpatialMap > Map : Sparse SpatialMap
Finally, a simple scene for sparse spatial map building on device could look like this,
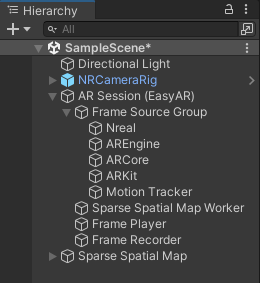
Scenes can be different according to features in use from both device SDK and EasyAR Sense Unity Plugin.
Add Device Support in EasyAR Scene
The following images use Nreal for example, operations are same when using other device extensions.
Prepare a Usable EasyAR Scene
In the next section, a usable EasyAR scene is required. You can reference How to Use Samples to use a sample, or create a new scene reference Start from Zero.
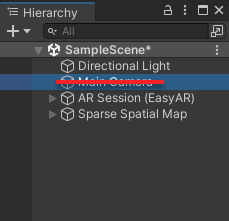
Delete Main Camera
Please follow device usage rules. Most device SDK will control the camera, but exceptions may exist.
There is already a camera inside device SDK objects, so you need to delete camera in the scene in most cases.
You can also judge if the deletion is needed according to your needs in some advanced usages.
Add EasyAR Components for device support in the Scene
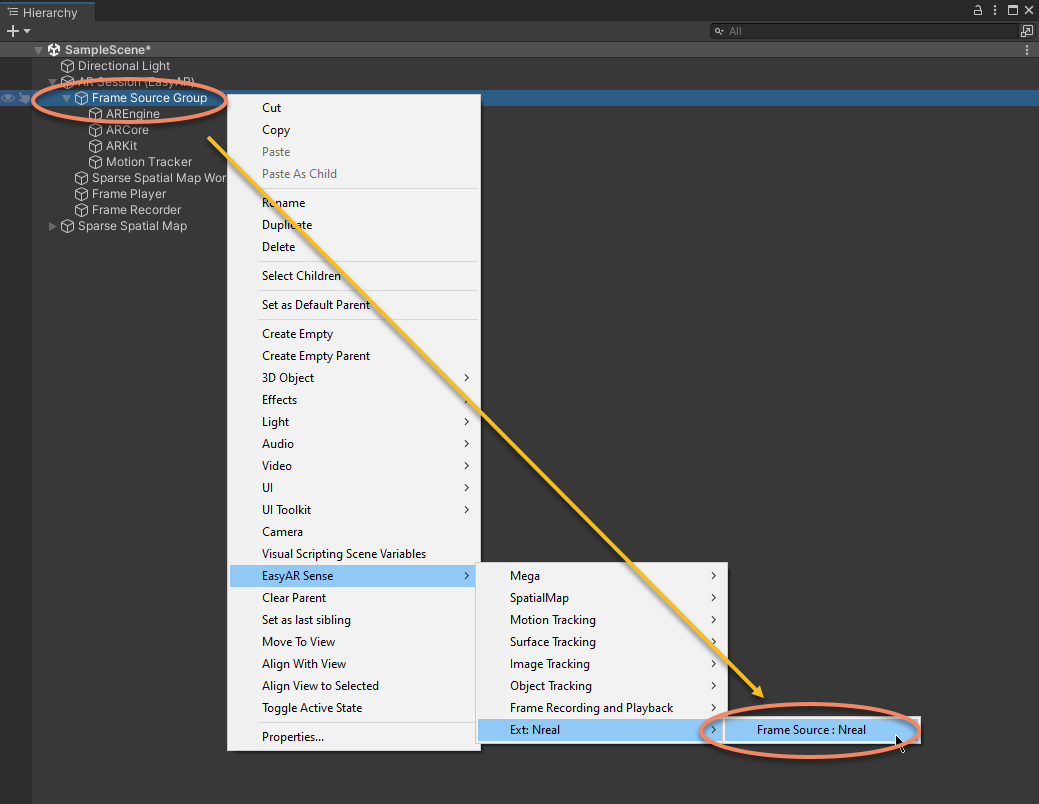
Add the corresponding device frame source in AR Session. Select AR Session (EasyAR) or Frame Source Group, and add using EasyAR Sense > Ext: * > Frame Source : *.
Move the device frame source to be the first,
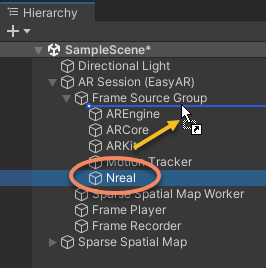
In some advanced usages, you can also move it to where you want, or change the order in scripts.
To use EasyAR on device, the device frame source must be selected as frame source in the AR Session after Session start.
This could usually be done by set ARComponentPicker.FrameSource to FirstAvailableActiveChild and make sure the device frame source is the first frame source in transform order,
Or set ARComponentPicker.FrameSource to Specify and specify the frame source to the device frame source.
Add device Components in the Scene
You can follow device documents to add device components in the scene.
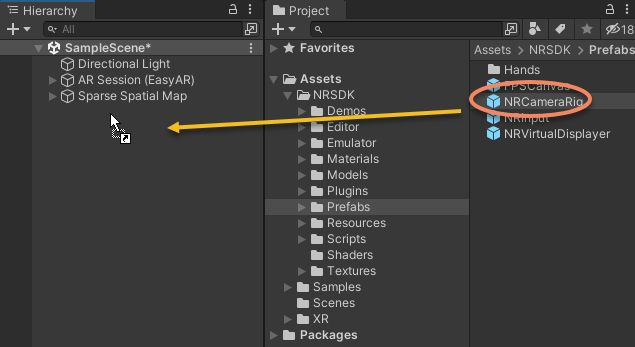
Take Nreal for example, in most of the cases, you need to add a NRCameraRig prefab (follow Nreal official instructions if there are any conflicts).
Finally, a simple scene for sparse spatial map building on device could look like this,
Scenes can be different according to features in use from both device SDK and EasyAR Sense Unity Plugin.
Before run on a device, make sure to read device official instructions for how to configure and run a scene containing device SDK.